Jan 9, 2024 | Maintenance, Materials, Roofing
Understanding Concrete Roof Tiles
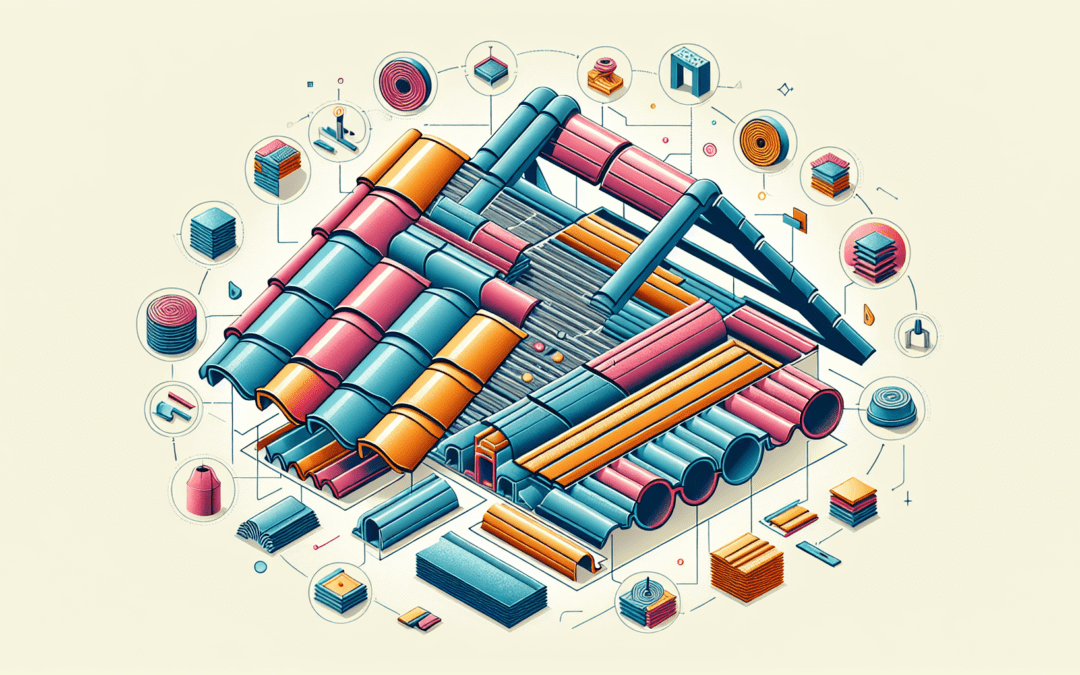
Concrete roof tiles are a popular choice for homes because they are durable, strong, and can look really nice. Just like picking out a new game or phone, knowing what makes a good concrete roof tile is important. Here, we’ll talk about the key things to look for when choosing concrete roof tiles for a house.
1. Weight
Concrete roof tiles are heavier than other types of roofing, like metal or asphalt shingles. Before choosing them, it’s important to make sure the house’s structure can support the weight. The weight of concrete roof tiles can vary, but knowing how much they weigh will help ensure the house is safe and secure.
2. Color and Style
Just like how we choose the color and style of our clothes, we can pick the color and style of our roof tiles too. Concrete tiles come in a variety of colors and shapes, such as flat, curved, or wavy, so you can pick the perfect look to match your home. It’s also key to remember that the color might fade a bit over time because of the sun.
3. Durability
One of the best things about concrete roof tiles is that they’re really strong. They can last a long time, sometimes more than 50 years, if they’re taken care of properly. They can stand up to heavy rain, wind, and even fire, which makes them a great choice for keeping your home safe.
4. Porosity
Porosity might sound complicated, but it’s just a fancy word for how much water a tile can soak up. Tiles with high porosity can absorb a lot of water, which isn’t great because it can lead to mold or damage in really rainy places. On the other hand, tiles with low porosity are better at keeping water out.
5. Energy Efficiency
Concrete roof tiles can also help keep your home cooler in the summer and warmer in the winter. This is because they’re good at insulating, or keeping the temperature inside your home steady. Choosing tiles that keep your home more comfortable can also help save money on heating and cooling bills.
6. Maintenance
Maintenance means keeping the roof tiles in good shape over time. Fortunately, concrete tiles don’t need a lot of upkeep. Occasionally, you might need to replace broken tiles or clean them to get rid of dirt or algae. Knowing what maintenance is needed can help you keep your roof looking nice for a long time.
In conclusion, when picking concrete roof tiles, think about their weight, color and style, durability, porosity, energy efficiency, and maintenance needs. Choosing the right tiles can make your home look great and ensure it stays safe and comfortable for years to come.
Jan 1, 2024 | Materials, Roofing
How to Apply Rubber Roof Coating Like a Pro
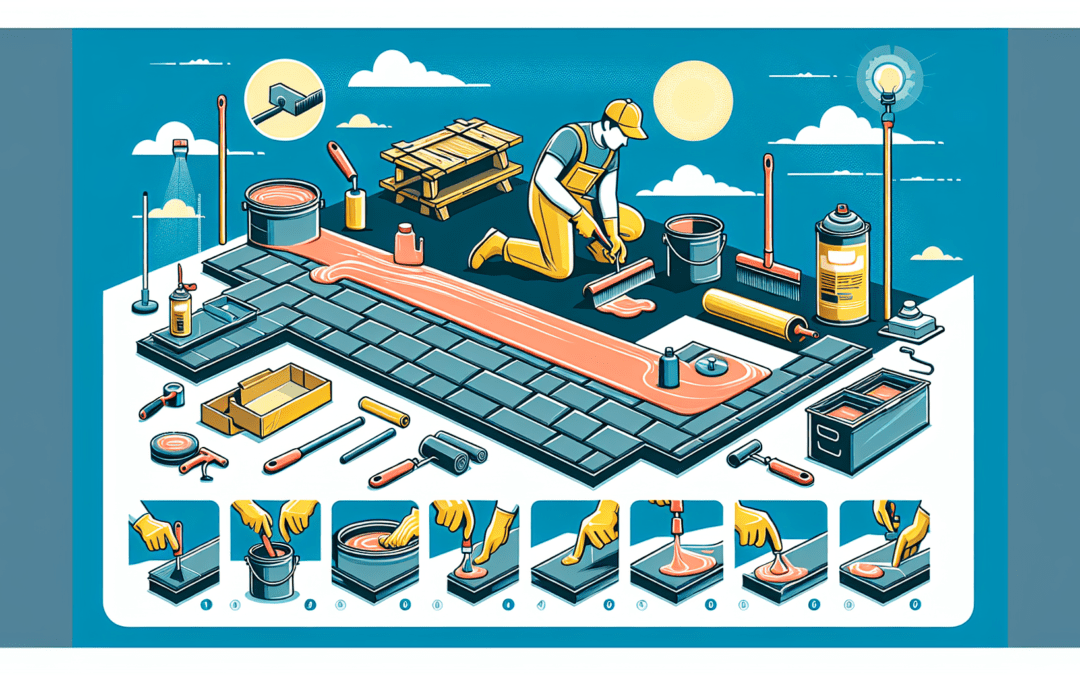
If you want to keep your roof in top shape, applying a rubber roof coating is a smart move. It not only protects your roof from leaks but also extends its life. Don’t worry if you’ve never done it before. This guide will help you apply rubber roof coating like a pro, step by step. So, let’s get started!
1. Pick the Right Day
Timing is everything! Choose a day that is dry and warm but not too hot. If it’s too cold, the coating won’t stick properly. And if it’s raining, well, it’s a no-go. A day with a temperature between 50°F to 70°F is perfect.
2. Get Your Roof Ready
The first step is to clean your roof really well. You want to remove any dirt, leaves, or other stuff that shouldn’t be there. Use a broom or a blower for this. For tougher grime, a pressure washer can do the trick. Just make sure your roof dries completely before the next step.
3. Fix Any Damage
Inspect your roof for any cracks or holes. If you find any, you need to fix them before applying the coating. You can use a roof patch or sealant for small repairs. For bigger issues, it might be best to ask for help from a professional.
4. Apply Primer (If Needed)
Some roofs might need a primer before the coating. The primer helps the coating stick better. Check the instructions on your rubber roof coating to see if this is necessary. If it is, apply the primer evenly and let it dry completely.
5. Mix the Coating
Now, it’s time to get your coating ready. Mix it well to make sure it’s smooth and ready to apply. Sometimes, sitting in the can might make it settle or separate, so mixing is essential.
6. Apply the Coating
You can use a roller or a brush to apply the coating. Start from one end and work your way to the other. Make sure to spread it evenly. You don’t want some spots to have too much coating and others not enough. Pay extra attention to seams and edges because that’s where leaks like to start.
7. Let It Dry
Once you’ve covered the whole roof, let the coating dry. The drying time can vary based on the weather, so check the instructions. You might need to apply a second coat, but only do this after the first one is completely dry.
Tips for Success
– Always follow the instructions on the product label.
– Wear protective clothing and gloves to keep the coating off your skin.
– Work in small sections to ensure an even application.
– Don’t rush. Take your time to get it right.
There you have it! Applying rubber roof coating might seem like a big job, but with these steps, you can do it successfully. Not only will your roof look great, but it will also be more protected from the elements. So, grab your supplies, pick the perfect day, and give your roof the care it deserves!
Dec 29, 2023 | Materials, Roofing
What is EPDM Rubber Roofing?
First off, EPDM stands for Ethylene Propylene Diene Monomer. That’s a mouthful, but don’t worry—it’s just a fancy way of saying rubber roof. This type of roofing is super popular because it’s strong, lasts a long time, and isn’t too hard to put on your roof. Plus, it’s really good at keeping water out, which is super important for any roof!
Tools and Materials Needed
Before we start, make sure you have the right tools and materials. You’re going to need:
- EPDM rubber sheets (the main part of your new roof)
- Adhesive (to stick it to your roof)
- A utility knife (for cutting the rubber to fit)
- Clean rags and a broom (for cleaning your roof)
- A roller (to make sure the EPDM sticks well)
Remember, safety first! Always use gloves and protective eyewear.
Preparing Your Roof
The first step is to make sure your roof is ready. You’ll need to clean it up real good. Use the broom to sweep off any dirt or leaves, and if you find any sharp or pointy bits sticking out, you’ve got to get rid of them so they don’t poke holes in your new rubber roof.
Applying the Adhesive
Now, it’s time to glue down your EPDM. Spread the adhesive on the roof where the EPDM will go. You don’t want too much glue, just a thin layer. Check the instructions on the adhesive to see how long it needs to dry. Sometimes, you stick the EPDM on while it’s still wet, and other times, you have to wait a bit.
Installing the EPDM Rubber
Next, carefully lay the EPDM sheet on the area you applied the adhesive to. Try not to let it fold or wrinkle. Smooth it out with your hands first, and then use the roller to press it down really well. This helps make sure there are no bubbles and that the EPDM sticks perfectly to the roof.
Cutting and Trimming
There’s a good chance your EPDM sheet is bigger than you need. That’s okay! Just use the utility knife to cut it to fit your roof. Be careful, though. You want a nice, smooth edge and no raggedy bits.
Finishing Touches
Once your EPDM is down and looking good, go over the edges one more time with the roller. Make sure it’s super secure. And that’s pretty much it! You’ve now got a rubber roof that’s going to keep water out and last a long time.
Care and Maintenance
Even though EPDM roofing is really tough, you still need to look after it. A couple of times a year, check your roof for any damage or areas where water might sneak in. And always keep it clean from leaves and other stuff that might fall on it.
Wrap-Up
Installing EPDM rubber roofing might seem like a big job, but with the right preparation and care, you can definitely do it! Just remember to work safely, follow the steps, and take your time. A well-installed rubber roof is a great investment that will protect your home for years to come.
Nov 9, 2023 | Materials, Roofing
Understanding Bubbles in EPDM Roofs
Have you ever seen little bubbles or blisters popping up on a roof? This can happen on many types of roofs, but it’s something people often notice on EPDM roofs. EPDM stands for Ethylene Propylene Diene Monomer, a type of rubber used in many flat roofs because it’s waterproof and lasts a long time. But sometimes, bubbles can form on these roofs. Let’s dive into why this happens and what we can do about it.
Why Do Bubbles Form?
Bubbles on an EPDM roof can be caused by a few different things. One common reason is trapped air. When the roof was being put on, if air got trapped under the rubber, it could form a bubble later on. Another reason could be moisture getting trapped. If there’s water underneath the rubber when it’s being installed, this moisture can turn into steam when it gets hot out, creating a bubble. Sometimes, the adhesive (the glue that sticks the EPDM to the roof) wasn’t applied properly, and that can lead to bubbles too.
Why Should We Care About Bubbles?
Bubbles might seem like a small problem, but they can lead to bigger issues if not taken care of. The biggest worry is that these bubbles can lead to leaks. Over time, the bubble might crack or split open, letting water get through the roof and into the building. Bubbles can also make your roof weaker, so it’s not just about keeping your building dry; it’s also about keeping your roof strong and lasting longer.
Fixing Bubbles on Your EPDM Roof
Checking and Preparing the Roof
First, it’s important to know how big the problem is. You or a professional can take a look at the roof to see how many bubbles there are and how big they’ve gotten. If the bubble is still small, the fix might be pretty simple. But if it’s a big bubble or if there are lots of them, it might need a bit more work. Either way, the roof will need to be clean and dry before any repairs can start.
Repairing Small Bubbles
For small bubbles, a professional might just cut the bubble open to let out the trapped air or moisture. Then, they’ll use a special glue to stick the cut parts back down. It’s like putting a patch on a flat tire. This helps keep water out and makes the roof strong in that spot again.
Handling Big Bubbles
Big bubbles might need to have a piece of new EPDM rubber put over the damaged area after it’s been cut open and flattened. This is like putting a big patch on the roof. It’s more work, but it makes sure the roof stays waterproof and can keep doing its job.
Preventing Bubbles in the Future
To avoid bubbles later on, it’s all about making sure the EPDM is installed properly from the start. This means making sure no air or moisture is trapped and that the adhesive is spread out evenly and carefully. Regular checks on the roof can also help catch any small issues before they turn into big bubble problems.
So, bubbles on an EPDM roof aren’t just a weird thing to look at—they’re a sign that something needs fixing. By understanding why they happen and how to fix them, we can keep our roofs strong and our buildings dry.
Oct 10, 2023 | Materials, Roofing, Suppliers
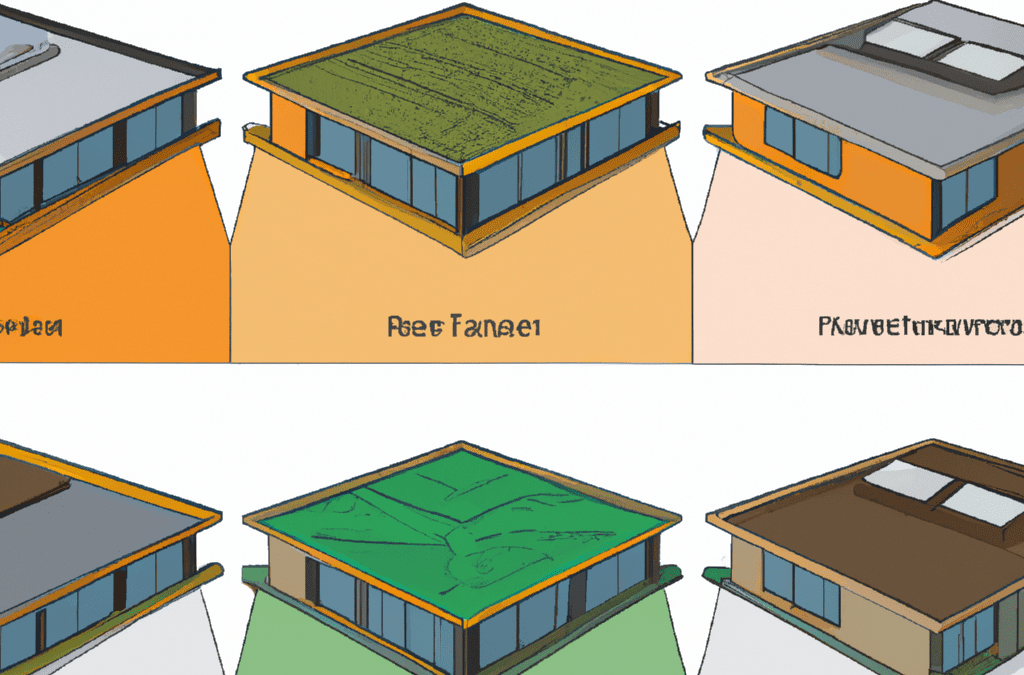
A flat roof is a type of roof that is nearly level or has a very slight pitch. These roofs are commonly found on commercial buildings, modern residential properties, and some historical buildings. Flat roofs have their own unique characteristics and come in different types. Below are some of the most common types of flat roofs:
Built-Up Roof (BUR)
A Built-Up Roof, also known as a BUR roof, is a traditional type of flat roof that consists of multiple layers of waterproof materials. These layers typically include gravel and tar. BUR roofs are known for their durability and longevity, making them a popular choice for commercial buildings.
Modified Bitumen Roof
Modified bitumen roofs are a modern alternative to BUR roofs. They are made from asphalt and a variety of rubber modifiers and solvents. These roofs are easy to install and maintain, making them a cost-effective option for flat roofs.
Single-Ply Membrane Roof
Single-ply membrane roofs are made from a single layer of synthetic material. There are three main types of single-ply membranes: TPO (thermoplastic polyolefin), PVC (polyvinyl chloride), and EPDM (ethylene propylene diene terpolymer). These roofs are lightweight, flexible, and resistant to UV radiation.
Green Roof
A green roof, also known as a living roof, is a flat roof that is partially or completely covered with vegetation and a waterproofing membrane. Green roofs provide insulation, reduce stormwater runoff, and improve air quality. They are a sustainable and eco-friendly option for flat roofs.
Metal Roof
Metal roofs are becoming increasingly popular for flat roofs due to their durability and longevity. They are made from metal panels or shingles and can be made from a variety of metals such as aluminum, steel, or copper. Metal roofs are lightweight, fire-resistant, and recyclable.
When choosing the right type of flat roof for your building, consider factors such as cost, durability, maintenance, and energy efficiency. Each type of flat roof has its own advantages and disadvantages, so it’s important to consult with a roofing professional to determine the best option for your specific needs.
Oct 6, 2023 | Materials, Roofing, Shingles
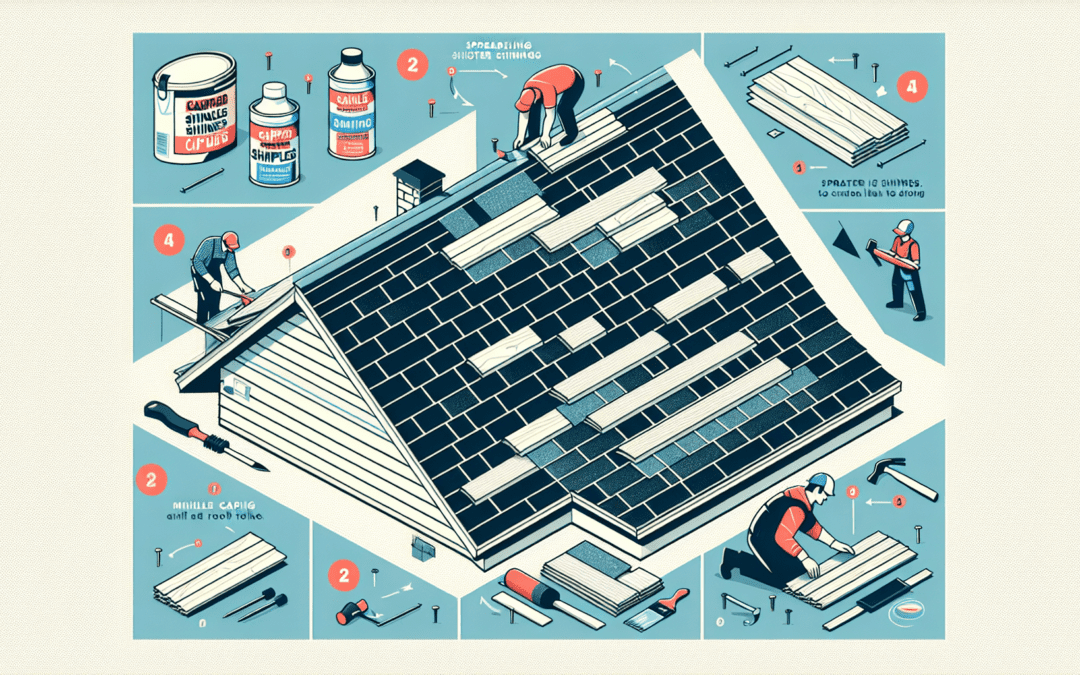
Have you ever looked at the top of a house and noticed a line of shingles running along the peak? That’s called capping. Capping shingles are the last pieces added when roofing, and they protect your house from water and damage. This guide will help you understand what capping shingles are and the basic steps to put them on your roof.
What Are Capping Shingles?
Capping shingles are special shingles used to cover the very top of a roof, where two sides meet. This part is also known as the ridge. Capping shingles are important because they keep water from getting into your house. They’re like the hat of your home, keeping it dry and safe.
What You Need
Before you start, here’s what you’ll need:
- Capping shingles (You can sometimes use regular shingles, but there are also special ridge shingles).
- Nails (roofing nails are best).
- A hammer or nail gun.
- A utility knife for cutting shingles to size.
Step-by-Step Guide to Capping Your Roof
Step 1: Prepare the Area
First, make sure the ridge of your roof is ready. If there are old shingles, remove them and clean the area. You want a flat surface for the new shingles.
Step 2: Installing the First Shingle
Begin at one end of the roof ridge. Place the first capping shingle so it overhangs slightly on both sides. Nail it down securely, usually with two nails on each side.
Step 3: Laying the Rest of the Shingles
Take the next shingle and place it on top of the first one so that it covers the nails from the first shingle. Keep going, making sure each new shingle overlaps the previous one. This overlapping pattern helps keep water out.
Step 4: Finishing Up
When you get to the other end of the ridge, you might have to trim the last shingle to fit. Use your utility knife to cut it to the right size, then nail it down like the others.
Extra Tips
Here are some bonus tips to make sure your roof capping goes smoothly:
- Always make sure to use enough nails to keep your shingles secure, but not so many that you damage them.
- Be very careful on the roof. It can be dangerous, especially if it’s steep. It might be a good idea to have someone help you or even to hire professionals if you’re not comfortable.
Conclusion
Adding capping shingles is an important part of making sure your roof is well-protected. By following these steps, you can help keep your home dry and secure. Remember, if you’re ever unsure, it’s okay to ask for help from someone who knows how to do it.