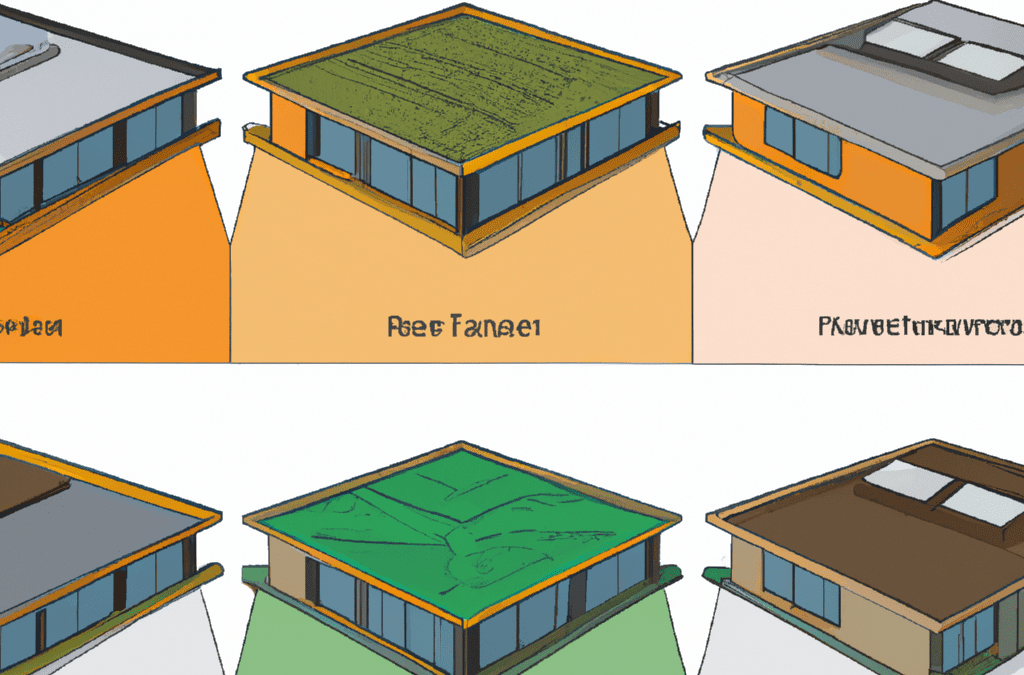
Types of Flat Roofs

Types of Flat Roofs

A flat roof is a type of roof that is nearly level or has a very slight pitch. These roofs are commonly found on commercial buildings, modern residential properties, and some historical buildings. Flat roofs have their own unique characteristics and come in different types. Below are some of the most common types of flat roofs:

Built-Up Roof (BUR)

A Built-Up Roof, also known as a BUR roof, is a traditional type of flat roof that consists of multiple layers of waterproof materials. These layers typically include gravel and tar. BUR roofs are known for their durability and longevity, making them a popular choice for commercial buildings.

Modified Bitumen Roof

Modified bitumen roofs are a modern alternative to BUR roofs. They are made from asphalt and a variety of rubber modifiers and solvents. These roofs are easy to install and maintain, making them a cost-effective option for flat roofs.

Single-Ply Membrane Roof

Single-ply membrane roofs are made from a single layer of synthetic material. There are three main types of single-ply membranes: TPO (thermoplastic polyolefin), PVC (polyvinyl chloride), and EPDM (ethylene propylene diene terpolymer). These roofs are lightweight, flexible, and resistant to UV radiation.

Green Roof

A green roof, also known as a living roof, is a flat roof that is partially or completely covered with vegetation and a waterproofing membrane. Green roofs provide insulation, reduce stormwater runoff, and improve air quality. They are a sustainable and eco-friendly option for flat roofs.

Metal Roof

Metal roofs are becoming increasingly popular for flat roofs due to their durability and longevity. They are made from metal panels or shingles and can be made from a variety of metals such as aluminum, steel, or copper. Metal roofs are lightweight, fire-resistant, and recyclable.

When choosing the right type of flat roof for your building, consider factors such as cost, durability, maintenance, and energy efficiency. Each type of flat roof has its own advantages and disadvantages, so it’s important to consult with a roofing professional to determine the best option for your specific needs.

Guide to Capping Shingles on Your Roof

Guide to Capping Shingles on Your Roof

Have you ever looked at the top of a house and noticed a line of shingles running along the peak? That’s called capping. Capping shingles are the last pieces added when roofing, and they protect your house from water and damage. This guide will help you understand what capping shingles are and the basic steps to put them on your roof.

What Are Capping Shingles?

Capping shingles are special shingles used to cover the very top of a roof, where two sides meet. This part is also known as the ridge. Capping shingles are important because they keep water from getting into your house. They’re like the hat of your home, keeping it dry and safe.

What You Need

Before you start, here’s what you’ll need:

  • Capping shingles (You can sometimes use regular shingles, but there are also special ridge shingles).
  • Nails (roofing nails are best).
  • A hammer or nail gun.
  • A utility knife for cutting shingles to size.

Step-by-Step Guide to Capping Your Roof

Step 1: Prepare the Area

First, make sure the ridge of your roof is ready. If there are old shingles, remove them and clean the area. You want a flat surface for the new shingles.

Step 2: Installing the First Shingle

Begin at one end of the roof ridge. Place the first capping shingle so it overhangs slightly on both sides. Nail it down securely, usually with two nails on each side.

Step 3: Laying the Rest of the Shingles

Take the next shingle and place it on top of the first one so that it covers the nails from the first shingle. Keep going, making sure each new shingle overlaps the previous one. This overlapping pattern helps keep water out.

Step 4: Finishing Up

When you get to the other end of the ridge, you might have to trim the last shingle to fit. Use your utility knife to cut it to the right size, then nail it down like the others.

Extra Tips

Here are some bonus tips to make sure your roof capping goes smoothly:

  • Always make sure to use enough nails to keep your shingles secure, but not so many that you damage them.
  • Be very careful on the roof. It can be dangerous, especially if it’s steep. It might be a good idea to have someone help you or even to hire professionals if you’re not comfortable.

Conclusion

Adding capping shingles is an important part of making sure your roof is well-protected. By following these steps, you can help keep your home dry and secure. Remember, if you’re ever unsure, it’s okay to ask for help from someone who knows how to do it.

Choosing the Right Roofing Contractor: A Guide

Choosing the Right Roofing Contractor: A Guide

Finding the right roofing contractor is essential for successful roof repair or replacement. Whether you’re dealing with storm damage, leaks, or it’s just time for a new roof, hiring a qualified and trustworthy roofing contractor ensures your home’s protection and your peace of mind. This guide outlines key steps and considerations to help homeowners select the right roofing professional for their project.

Get Local Referrals

Start your search by asking friends, family, and neighbors for referrals. Local contractors are more familiar with regional building codes and have established relationships with local suppliers and crews. Plus, local companies are less likely to be scam operations, which occasionally follow storms and other disaster events.

Check for Proper Licensing and Insurance

Ensure any contractor you consider has the proper licensing for your area and carries both liability insurance and workers’ compensation. This protects you in case of accidents or damage during the roofing project. Reliable contractors should have no problem providing proof of insurance and licensing upon request.

Look for Manufacturer Designations

Manufacturer designations are considered a badge of honor among contractors because it means they’ve passed certain minimum requirements to be factory-certified. This often includes extensive training or a proven track record. Not all manufacturers have these programs, but when they do, it’s a good indicator of a contractor’s competence and reliability.

Check Better Business Bureau (BBB) Ratings

After a storm, homeowners sometimes find themselves targeted by storm chasersโ€”contractors who come in from out of town to capitalize on the disaster. Checking a contractor’s BBB rating and ensuring they have a solid score can help weed out less reputable companies. Avoid contractors who don’t exist on BBB.org.

Get an Extensive Warranty

Not all contractors can offer manufacturer warranties that include coverage of the contractor’s workmanship. If they install the roof incorrectly, it might take months or years for the damage to showโ€”and insurance won’t pay for it. A warranty covering workmanship protects you from having to pay for their mistakes out of pocket.

Be Wary of Pressure Tactics

A reputable contractor will not pressure you into signing a contract before you’ve had a chance to evaluate their estimate thoroughly or before the insurance company has estimated the damage. Be cautious of contractors who push you to sign an agreement quickly or pay a large deposit upfront.

Evaluate Communication

Good communication is essential. If a contractor doesn’t return your calls, fails to provide documents you’ve requested, or doesn’t follow through in a timely manner, it may be a sign to look elsewhere. Your contractor should be responsive, answering your questions and providing you with the information and reassurance you need throughout the project.

Request a Detailed Estimate

Before making your final decision, ask for a detailed estimate in writing. This should include the cost of removing the old roof, adding the new roof, materials, and anything else that might come up during the process. A detailed proposal helps you understand exactly what you’re paying for and prevents unexpected costs.

In conclusion, taking the time to carefully choose a roofing contractor can lead to better project outcomes and eliminate many common headaches associated with home repairs. By considering local referrals, checking qualifications and insurance, evaluating communication, and insisting on detailed estimates and warranties, you can ensure that your roofing project is in capable hands.

Key Steps for a Successful Roof Installation

Key Steps for a Successful Roof Installation

Introduction to Roof Installation

Roof installation is a critical component of any building construction or renovation project. It requires careful planning, the right materials, and skilled labor to ensure a long-lasting and durable roof. A well-installed roof protects a building from the elements, enhances its aesthetic appeal, and contributes to its overall structural integrity. This article outlines the key steps involved in a successful roof installation process.

Step 1: Choosing the Right Materials

The first step in any roof installation project is selecting the right materials. The choice of materials depends on various factors including the climate of the area, the architectural style of the property, and the budget. Common roofing materials include asphalt shingles, metal, tile, and slate. It is crucial to research and understand the pros and cons of each material to ensure it meets the specific needs of your project.

Step 2: Hiring a Qualified Roofer

The success of a roof installation largely depends on the expertise and experience of the roofer. It’s essential to hire a licensed, insured, and reputable roofing contractor who has experience working with your chosen roofing material. Look for contractors with positive reviews and ask for references. Verify their credentials and ensure they offer a warranty on their workmanship.

Step 3: Preparing the Roof Deck

Before installing the new roofing material, the existing roof (if applicable) needs to be carefully removed and the roof deck inspected. Any damaged or rotten decking should be repaired or replaced to provide a solid foundation for the new roof. This step is crucial to avoid any future problems like leaks or structural damage.

Step 4: Installing Underlayment

The underlayment is a water-resistant or waterproof barrier material installed directly onto the roof deck. It provides an additional layer of protection from the elements. Depending on the type of roofing material being used, different types of underlayment may be required. Ensuring proper installation of the underlayment is essential for the overall effectiveness of the roofing system.

Step 5: Installing Roofing Material

With the underlayment in place, the next step is to install the roofing material. This process varies significantly depending on the type of material. For instance, the installation of asphalt shingles differs greatly from that of tiles or metal roofing. Following the manufacturer’s instructions and adhering to local building codes is critical during this phase. Proper installation ensures the longevity and durability of the roof.

Step 6: Installing Flashing

Flashing is a material (usually metal) installed to direct water away from critical areas of the roof, such as vents, chimneys, and where the roof meets a wall. Proper installation of flashing is essential to prevent water penetration and protect the structural integrity of the roof.

Step 7: Final Inspection and Cleanup

After the installation is complete, a thorough inspection should be conducted to ensure that the roof is properly installed and free of defects. Any issues should be addressed promptly by the installation team. Additionally, a good roofing contractor will ensure the job site is cleaned up, removing all construction debris and materials.

Conclusion

A successful roof installation requires careful planning, the right materials, and skilled professionals. By following these key steps, you can ensure that your roof will be durable, functional, and aesthetically pleasing. Remember to conduct regular maintenance and inspections to prolong the life of your roof and protect your investment.

Essential Guide to Roof Installation

Essential Guide to Roof Installation

The Essential Guide to Roof Installation

Roof installation is a significant investment in any property. It’s not only about protecting your home or building from the elements, but it’s also about enhancing its aesthetic appeal and potentially increasing its value. This essential guide will walk you through the basics of roof installation, ensuring you are well-informed before embarking on this critical project.

Understanding Roofing Materials

Choosing the right material is the first step in roof installation. Each material has its pros and cons, including lifespan, cost, durability, and aesthetic appeal. Among the most common roofing materials are asphalt shingles, metal roofing, clay and concrete tiles, wood shakes and shingles, and slate. Researching and consulting with a professional can help you select the material that best suits your region’s climate and your home’s architectural style.

Preparation is Key

Before the actual installation begins, thorough preparation is crucial. This includes obtaining the necessary permits, which vary according to local building codes. Additionally, you’ll need to choose a reputable contractor. Look for professionals with solid references, ample experience, and appropriate insurance. Proper preparation also involves scheduling the installation during a season with favorable weather conditions to avoid unnecessary delays.

The Installation Process

The roof installation process will vary depending on the chosen material and the complexity of your roof. However, the basic steps include removing the old roof, examining and repairing the roof decking, installing underlayment and flashing, and finally, laying down the new roofing material. For example, the process could slightly vary if installing a skylight or additional ventilation systems. A quality contractor will ensure that each step is conducted with the utmost care to avoid future issues.

Maintenance: The Key to Longevity

Once your new roof is installed, it’s crucial to maintain it properly to extend its life and uphold your home’s safety and aesthetics. Regular inspections, especially after severe weather events, can identify and rectify minor issues before they become significant problems. Cleaning gutters, removing debris, and trimming overhanging tree branches can also help protect your roof. Moreover, ensure you understand the warranty of your new roof and the maintenance it requires to remain valid.

Understanding Installation Costs

Costs can vary widely based on the roofing materials, the size and complexity of your roof, and labor costs in your area. While it may be tempting to choose the least expensive option, consider the lifespan and durability of the materials and the credibility of the contractor. Investing in quality materials and skilled labor can save you money and headaches in the long run.

Conclusion

Roof installation is a complex process that requires careful planning, from selecting the right materials and contractor to understanding the costs involved. By taking a thoughtful approach to each of these aspects, you can ensure your roofing project is successful, enhancing your property’s protection, aesthetic appeal, and value for years to come.

Key Steps for a Successful Roof Replacement

Key Steps for a Successful Roof Replacement

Introduction

Roof replacement is a significant investment in your home or commercial property that demands careful planning and execution. Whether due to aging, extreme weather damage, or enhancing your property’s value, a successful roof replacement project can protect your property and improve its aesthetic appeal. Understanding the key steps involved can help you navigate the process smoothly, ensuring a durable and cost-effective outcome.

Step 1: Comprehensive Roof Inspection

Before embarking on a roof replacement, itโ€™s crucial to start with a thorough roof inspection. Professional roofing contractors can assess the extent of damage or wear and determine if a full replacement is necessary. An inspection will highlight issues such as leaks, missing or broken shingles, and structural deficiencies. This step is vital in planning the scope of the replacement project and in choosing the right materials and strategies for your roofโ€™s specific needs.

Step 2: Choosing the Right Materials

Roofing materials vary widely in terms of durability, cost, aesthetics, and suitability for different climatic conditions. Common options include asphalt shingles, metal roofing, clay tiles, and slate roofing. Each material has its advantages and limitations. Consider factors such as lifespan, maintenance, color and style options, as well as how the weight of the material will impact your homeโ€™s structure. Selecting the right material is a crucial decision that will affect your roofโ€™s performance and appearance for years to come.

Step 3: Hiring a Professional Roofing Contractor

Finding a reputable and experienced roofing contractor is pivotal to the success of your project. Look for licensed, insured contractors with an established track record in your community. Seek recommendations from friends or professionals and read online reviews. A reliable contractor will not only provide expert installation but also offer valuable advice on the best materials and maintenance practices for your roof.

Step 4: Planning and Permits

Once you have selected your roofing material and contractor, the next step involves detailed planning and obtaining the necessary permits. Your contractor should be able to help you navigate local building codes and regulations that apply to roofing projects. This step ensures that all work performed is up to standard, avoiding costly penalties and ensuring that your roof replacement project is legally compliant.

Step 5: Preparing for Roof Replacement

Before the actual work begins, itโ€™s important to prepare your property. This might involve removing or covering landscaping and outdoor furniture to protect them from damage. Internally, consider covering furniture and valuables to shield them from dust and debris. Your contractor should also set up safety measures to protect workers and the property during the replacement process.

Step 6: Execution and Quality Control

The roof replacement process involves removing the old roofing material, making any necessary repairs to the underlying structure, and installing the new roofing material. Throughout the project, itโ€™s essential to communicate with your contractor and conduct periodic checks to ensure the work meets quality standards and adheres to the agreed timeline. Proper installation is critical to maximizing the life of your new roof.

Step 7: Cleanup and Final Inspection

After the installation is complete, a reputable contractor will conduct a thorough cleanup of the site, removing all debris and leaving your property in its original condition. The final step involves a detailed inspection of the new roof by the contractor to ensure that it meets all quality and safety standards. This is also an opportunity for you to ask questions and understand any maintenance requirements.

Conclusion

A successful roof replacement requires careful planning, choosing the right materials, and partnering with a professional contractor. By following these key steps, you can ensure a smooth process and enjoy the benefits of a durable, high-performing roof that enhances the value and safety of your property for years to come.